

There are two major steps to making paper snowflakes: folding and cutting.
F O L D I N G
This is how I fold my paper into 12 parts giving it a hexagonal shape when you’re done.
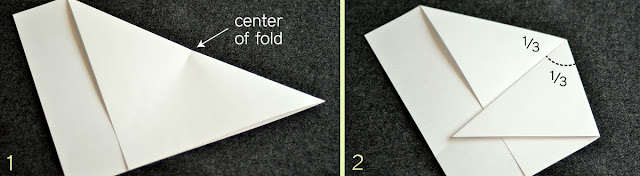
Start by folding one corner and edge up to the adjacent edge creating a triangle(1). Crease the fold to mark the center (1). Fold the triangle into thirds with the point at that center. I eye-ball it and adjust it until it is just right – a 30 degree angle (2).
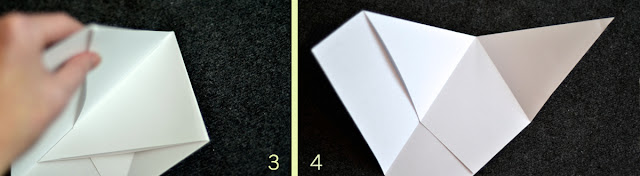
The folds are just right when I fold the other side in and it matches the same size triangle created (3). (This is where I remind you that math really is cool and helpful in everyday life =). Once I FIND THIS ANGLE I STOP and use this paper as a template to fold the rest of my papers. My papers all now look like photo #4.
I then take each of the three triangles that were created and fold them in half (5-9). Taking the left side I fold it back inward then take the edge back to the left until it is aligned with the fold – and crease it (5).

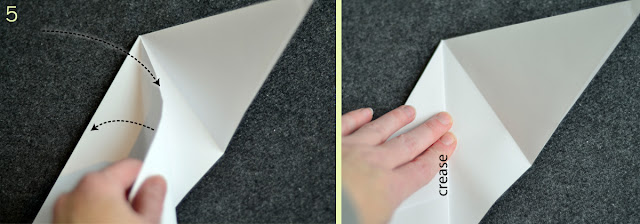
I do this for the right side as well (6). If I open those folds back, you can see the new folds (7).
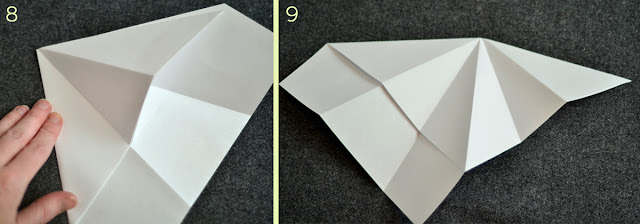

Just need to finish off by creasing the center triangle by folding the paper backwards (8). Now you have an accordion style fold (9).


Hold the folds together (10) and cut off the excess on top (11). Your paper is now ready (12) for the cutting part.
C U T T I N G

I happen to always cut the center because it will unfold and lay flat better when done. From there I cut one or two shapes on one side of the fold then flip it over and cut one to three shapes on the other side. Sometimes cut all the way over, getting close to the other edge.
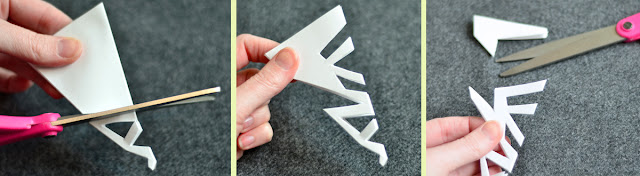
The key is SIMPLE SHAPES. Almost every shape is only 2 or 3 cuts to make it! I CUT AWAY a lot of the paper, thinking more about the white part that I’m leaving then the shape I’m cutting out. I often have several shapes end near a similar spot. And remember to cut a chunk OFF THE TOP EDGE.

Here are examples of several snowflakes that are simply cut and how more detailed they become when they are unfolded.


Even just really simple triangle cuts back and forth makes for a cool snowflake. Or experiment with adding curved cuts. Enjoy!
